

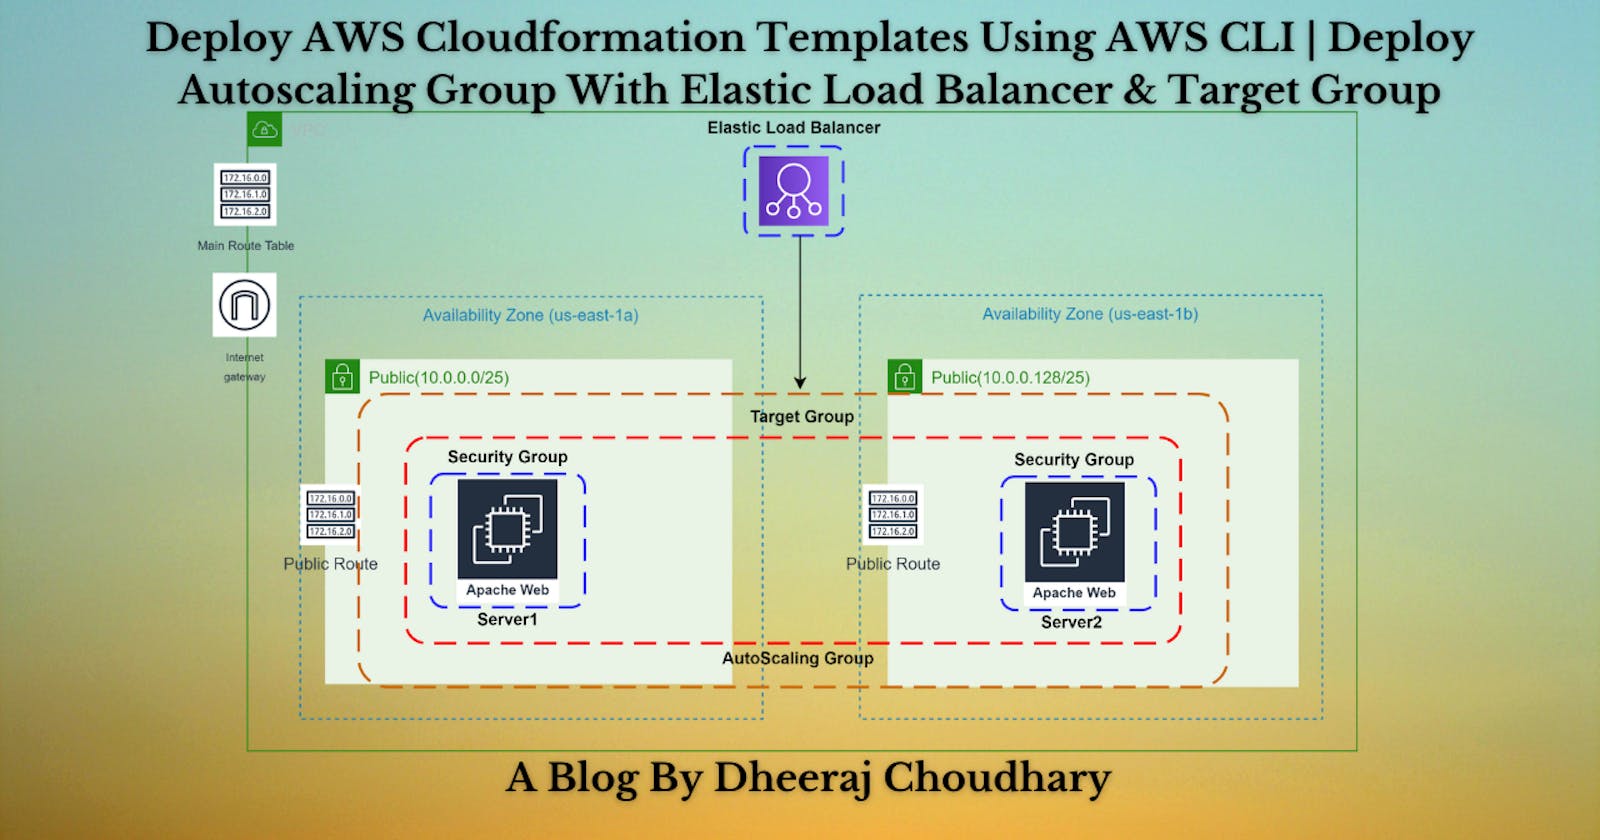
Deploy AWS Cloudformation Templates Using AWS CLI | Deploy Autoscaling Group With Elastic Load Balancer & Target Group


Table of contents
Welcome back to the series of AWS Cloudformation For Beginners 👨🏻💻. In this blog we create launch configuration along with security group and autoscaling group.
If you are a beginner and want to start your journey towards infra-as-code developer as part of your devops role buckle up 🚴♂️ and lets get started and understand core cloudformation concepts by implementing it...🎬
❗️❗️❗️ Pre-Requisite ❗️❗️❗️
1️⃣ Add visual studio code extension [Mandatory]
2️⃣ Adding VS Code Indentation Extension For Cloudformation Templates [Optional]
3️⃣ Deploy VPC, IGW & Associate [Mandatory]
4️⃣ Deploy only public subnet template from below blog [Mandatory].Make sure to create 2 public subnets
Parameters:
  CustomVPC:
    Description: Select One VPC available in your existing account
    Type: AWS::EC2::VPC::Id
    Default: <"Your VPC ID">
  CustomInternetGateway:
    Description: Select One internet gateway available in your existing account
    Type: String
    Default: <"Your Internet Gateway ID">

Resources:
  PublicSubnet1:
    Type: AWS::EC2::Subnet
    Properties:
      AvailabilityZone: "us-east-1a"
      MapPublicIpOnLaunch: true
      VpcId: !Ref CustomVPC
      CidrBlock: 10.0.0.0/25
      Tags:
        - Key: Name
          Value: PublicSubnet1
  PublicSubnet2:
    Type: AWS::EC2::Subnet
    Properties:
      AvailabilityZone: "us-east-1b"
      MapPublicIpOnLaunch: true
      VpcId: !Ref CustomVPC
      CidrBlock: 10.0.0.128/25

      Tags:
        - Key: Name
          Value: PublicSubnet2
  PublicRouteTable:
    Type: AWS::EC2::RouteTable
    Properties:
      VpcId: !Ref CustomVPC
      Tags:
        - Key: Name
          Value: PublicRouteTable
  PublicRoute:
    Type: AWS::EC2::Route
    Properties:
      RouteTableId: !Ref PublicRouteTable
      DestinationCidrBlock: 0.0.0.0/0
      GatewayId: !Ref CustomInternetGateway
  PublicSubnetRouteTableAssociation1:
    Type: AWS::EC2::SubnetRouteTableAssociation
    Properties:
      SubnetId: !Ref PublicSubnet1
      RouteTableId: !Ref PublicRouteTable
  PublicSubnetRouteTableAssociation2:
    Type: AWS::EC2::SubnetRouteTableAssociation
    Properties:
      SubnetId: !Ref PublicSubnet2
      RouteTableId: !Ref PublicRouteTable
Outputs:
  outputPublicSubnets1:
    Description: A reference to the created Public subnet
    Value: !Ref PublicSubnet1
    Export:
      Name: PublicSubnet1
  outputPublicSubnets2:
    Description: A reference to the created Public subnet
    Value: !Ref PublicSubnet2
    Export:
      Name: PublicSubnet2
🔊 To view double subnet github code click here
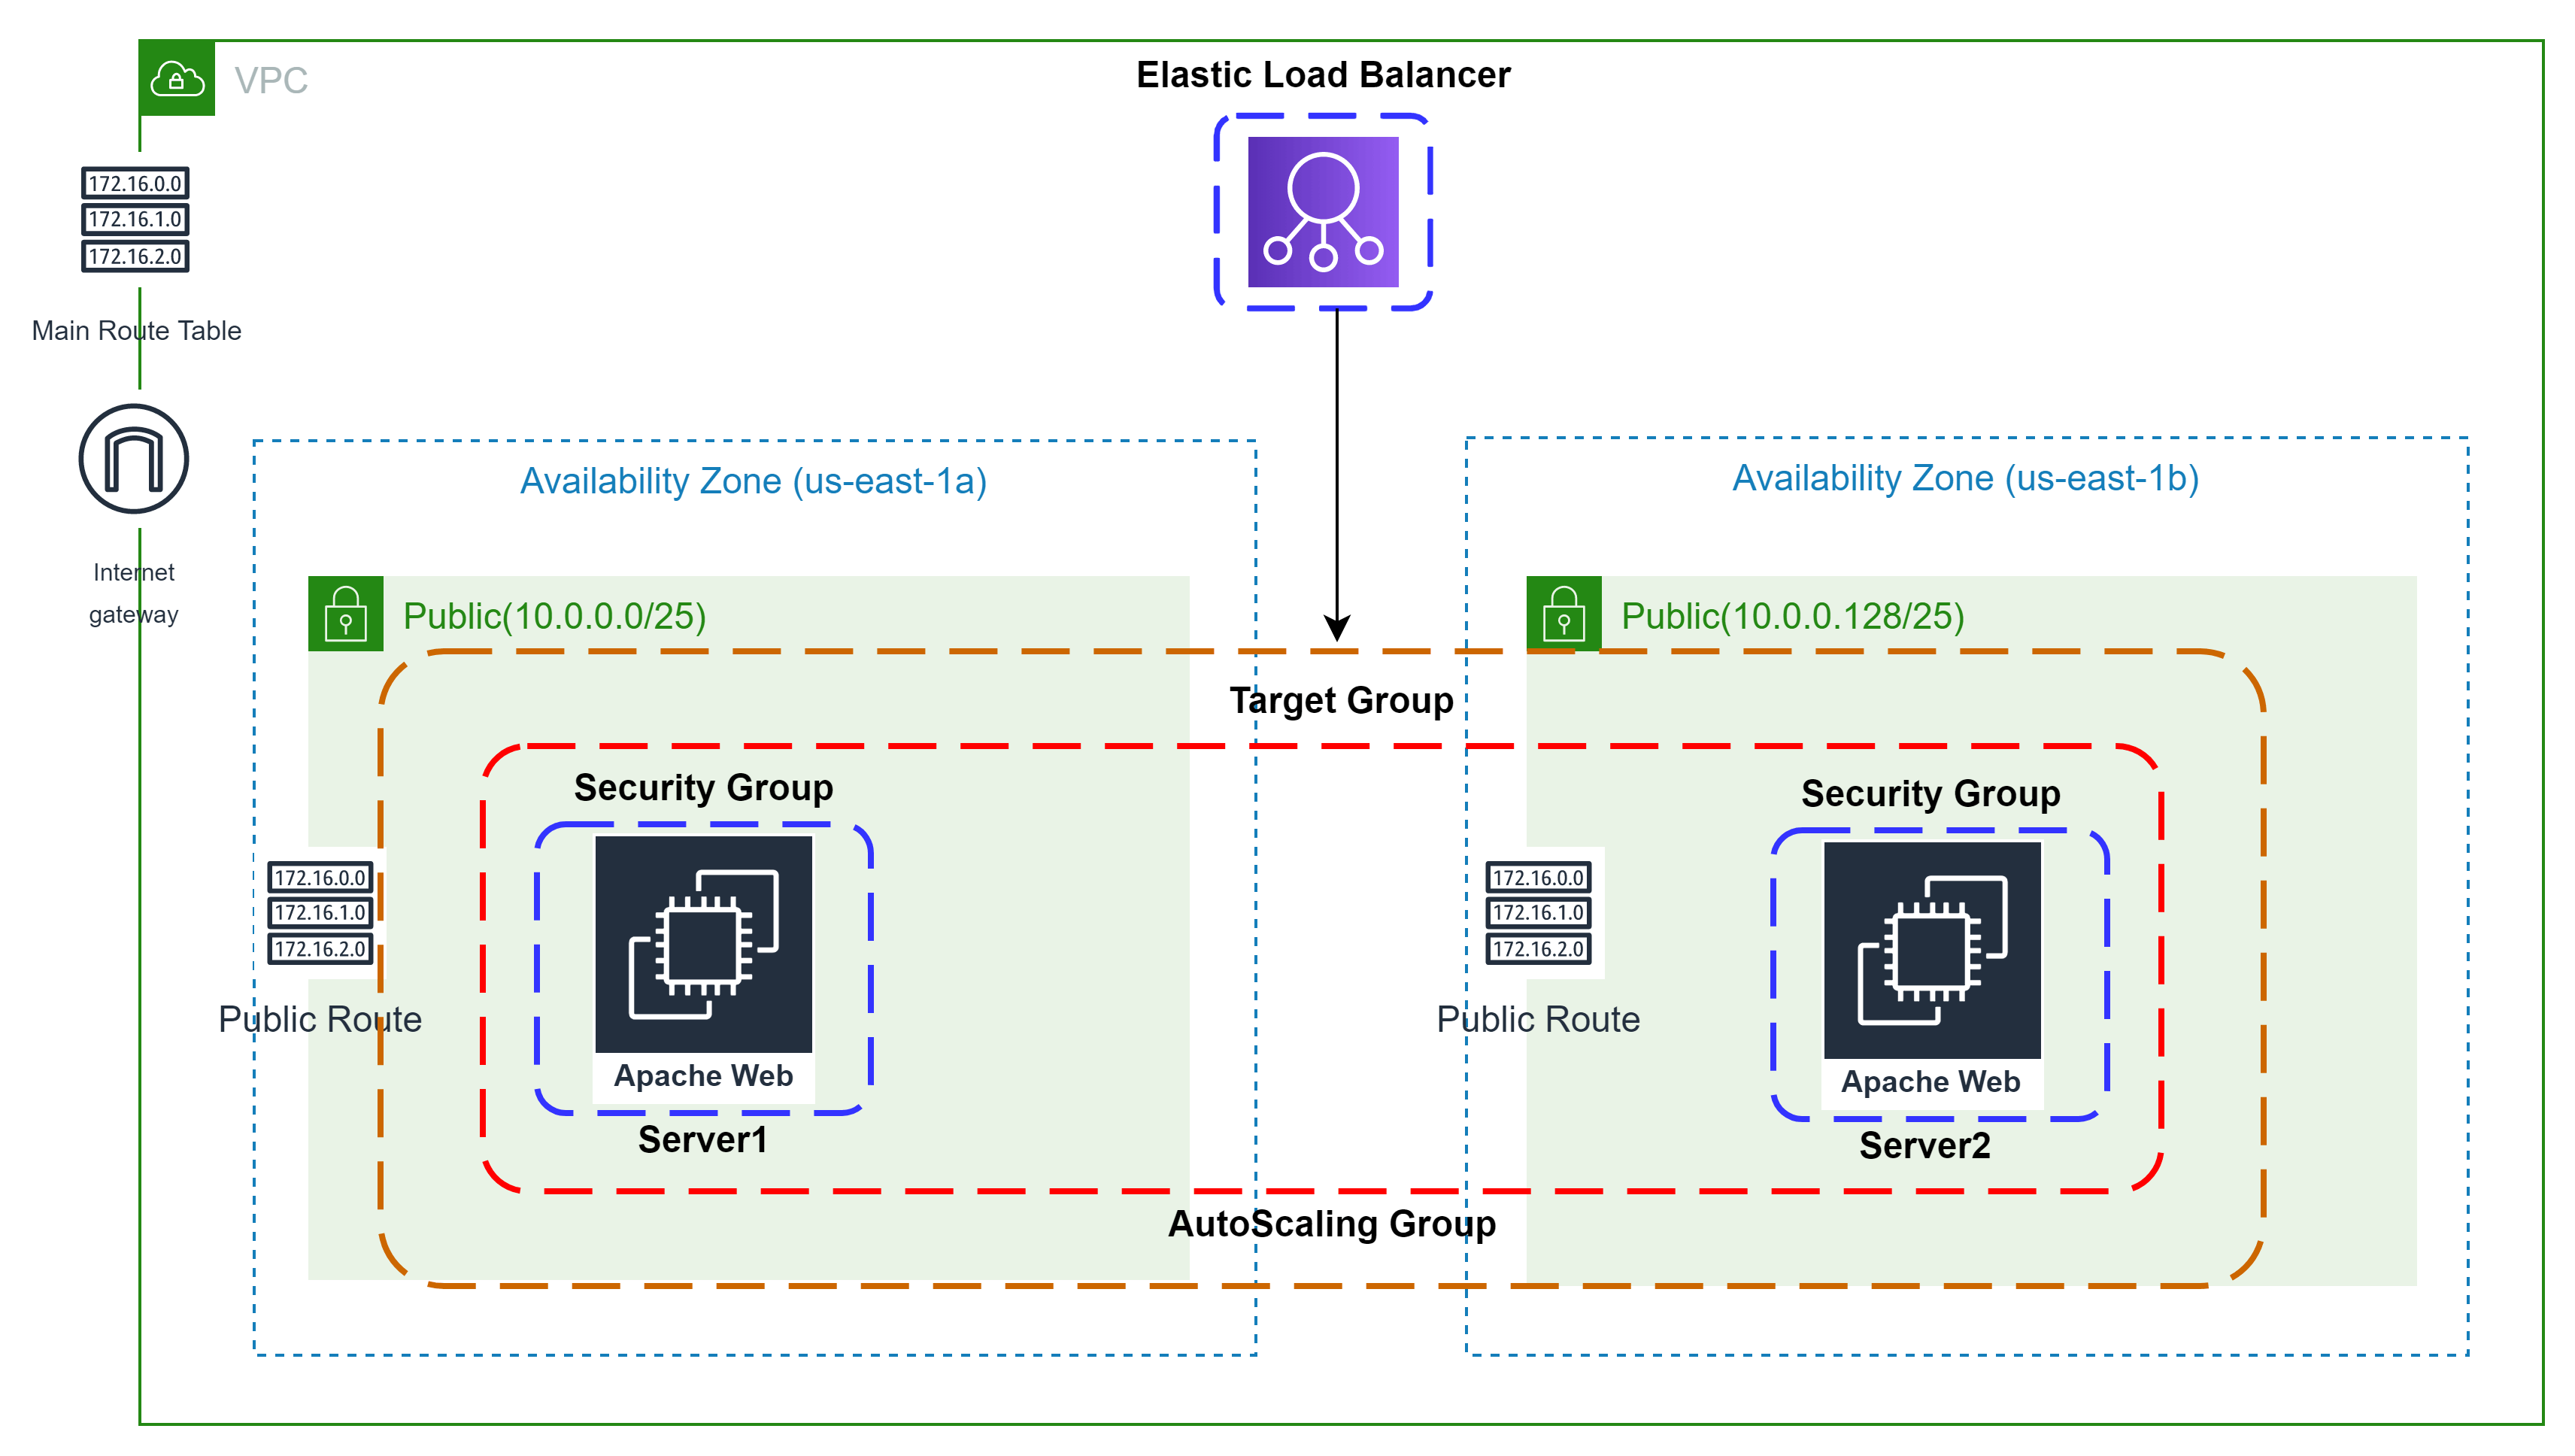
🎨 Diagrammatic Representation 🎨
👨🏻💻Deploy Auto Scaling Group With Launch Config👨🏻💻
🔳 Parameters
✦ CustomVPC :- Using this parameter for VPC "AWS::EC2::VPC::Id" we can list existing VPC list into the account and select anyone from them. Apart from this list we can also you default value if no value is selected in the parameter.
✦ PublicSubnet: Using this parameter for Subnet "AWS::EC2::Subnet::Id" we can list existing subnet list from the account and select anyone from them. Apart from this list we can also you default value if no value is selected in the parameter.
✦ PublicSubnets :- Using CommaDelimitedList parameters we can create a list of values of type string and pass it to arguments as a list.Parameters: CustomVPC: Description: Select One VPC available in your existing account Type: AWS::EC2::VPC::Id Default: "<your default VPC ID>" PublicSubnets: Type: CommaDelimitedList Description: The list of SubnetIds in your Virtual Private Cloud (VPC) Default: <subnet id 1>, <subnet id 2> #You can add multiple subnet ids here 🔳 Resources
✦ ELBTargetGroup:- Real work of target group is to inform a loadbalancer to whom he should route traffic like EC2/Fixed IP Address/lambda.
➖ HealthCheckIntervalSeconds: The approximate amount of time, in seconds, between health checks of an individual target.
➖ HealthCheckTimeoutSeconds: The amount of time, in seconds, during which no response from a target means a failed health check.
➖ HealthyThresholdCount: The number of consecutive health checks successes required before considering an unhealthy target healthy.
➖ UnhealthyThresholdCount: The number of consecutive health check failures required before considering a target unhealthy.
➖ VpcId: Id of your existing VPC.
➖ TargetType: The type of target that you must specify when registering targets with this target group. You can specific alb/instance/ip/lambda.
➖ Targets: As part of this property we are mentioning the instance id's to be added as targets.ELBTargetGroup: Type: 'AWS::ElasticLoadBalancingV2::TargetGroup' Properties: HealthCheckIntervalSeconds: 6 HealthCheckTimeoutSeconds: 5 HealthyThresholdCount: 2 Port: 80 Protocol: HTTP UnhealthyThresholdCount: 2 VpcId: !Ref CustomVPC TargetType: instance ✦ ELBSecurityGroup:- Creating Security group and enabling ingress with http and ssh port.
➖ GroupName:- This property is used to mention security group name.
➖ GroupDescription:- This property is used to mention security group description and its mandatory property for this resource.
➖ SecurityGroupIngress:- This property is used to add ingress rules for [udp/tcp] ports enabled secured access to your resources.
➖ Tags:- One of the most important property used in all resources. Always make sure to attach tags for all your resources.ELBSecurityGroup: Type: AWS::EC2::SecurityGroup Properties: GroupName: "ELBTraffic" GroupDescription: "Enable HTTP access on the inbound port for ELB" VpcId: !Ref CustomVPC SecurityGroupIngress: - IpProtocol: tcp FromPort: 80 ToPort: 80 CidrIp: 0.0.0.0/0 - IpProtocol: tcp FromPort: 443 ToPort: 443 CidrIp: 0.0.0.0/0 Tags: - Key: Name Value: ELBSecurityGroup ✦ ElasticLoadBalancer:- Elastic Load Balancing (ELB) automatically distributes incoming application traffic across multiple targets and virtual appliances in one or more Availability Zones (AZs).As part of this resource we use type "AWS::ElasticLoadBalancingV2::LoadBalancer".
➖ Subnets: The IDs of the public subnets. You can specify only one subnet per Availability Zone.
➖ SecurityGroups: List IDs of the security groups for the load balancer. ElasticLoadBalancer: Type: 'AWS::ElasticLoadBalancingV2::LoadBalancer' Properties: Subnets: !Ref PublicSubnets SecurityGroups: - !Ref ELBSecurityGroup ✦ ElbListener:- A listener is a process that checks for connection requests, using the protocol and port that you configure. The rules that you define for a listener determine how the load balancer routes requests to its registered targets. As part of this resource we use type "AWS::ElasticLoadBalancingV2::Listener".
➖ DefaultActions: The actions for the default rule. You cannot define a condition for a default rule.
➖ LoadBalancerArn: Refer Amazon Resource Name (ARN) of the load balancer the we have created in above code block.ElbListener: Type: 'AWS::ElasticLoadBalancingV2::Listener' Properties: DefaultActions: - Type: forward TargetGroupArn: !Ref ELBTargetGroup LoadBalancerArn: !Ref ElasticLoadBalancer Port: '80' Protocol: HTTP ✦ AsgConfig:- This resource is used to create pre-configured instance configuration which is later used by autoscaling group to deploy instances.
➖ ImageId:- This property is used to mention EC2 image ID based on which you want to launch your EC2 Instance.
➖ InstanceType:- This property is used to mention which type of instance you want to launch smal/medium/large based on your requirement.
➖ SecurityGroupIds:- This property is used to add list of security group you want to attach to your EC2 instance for enabling access control based on your security requirements.
➖ User Data: User data is user data/commands that you can specify at the time of launching your instance. These data/command executes after your EC2 instance starts. You don’t need to SSH into your EC2 instance and run those command one by one. Rather all you need is to specify the whole script in the user data section and they get executed once your instance boots up. You can use AWS CloudFormation to automatically install, configure, and start applications on Amazon EC2 instances. Doing so enables you to easily replicate deployments and update existing installations without connecting directly to the instance, which can save you a lot of time and effort.AsgConfig: Type: AWS::AutoScaling::LaunchConfiguration Properties: InstanceType: t2.micro SecurityGroups: - !Ref ELBSecurityGroup ImageId: "ami-04505e74c0741db8d" UserData: Fn::Base64: !Sub | #!/bin/bash sudo su sudo apt-get update -y sudo apt-get install -y apache2 sudo ufw allow -y 'Apache' sudo systemctl start apache2 sudo systemctl enable apache2 echo Hello Viewers from $(hostname -f) > /var/www/html/index.html ✦ AsgGroup:- This resource is used to launch autoscaling group to by using pre-defined launch configuration to achieve high availability.
➖ VPCZoneIdentifier:- Here you will have to define availability zones/subnetIds in which you want your instances to be launched and autoscaled.
➖ MinSize:- This is mandatory parameter and you need to define the min number of instances which should always be running as part of this autoscaling group.
➖ MaxSize:- This is mandatory parameter and you need to define the max number of instances till which autoscaling group can expand based on multiple scenarios.AsgGroup: Type: AWS::AutoScaling::AutoScalingGroup DependsOn: - ELBTargetGroup - ElasticLoadBalancer Properties: VPCZoneIdentifier: !Ref PublicSubnets LaunchConfigurationName: !Ref AsgConfig MinSize: '1' MaxSize: '2' HealthCheckGracePeriod: 300 MaxInstanceLifetime: 2592000 TargetGroupARNs: - !Ref ELBTargetGroup 🔳 Outputs: Its always a best practice to print output for your resources.
✦ outputELBTargetGroup: A reference to the created Target Group.
✦ outputELBSecurityGroup: A reference to the created Security Group.
✦ outputElasticLoadBalancer: A reference to the created Elastic Load Balancer.
✦ outputElasticListener: A reference to the created Elastic Load Balancer Listener.
✦ outputAsgConfig:- Id for autoscaling launch configuration.
✦ outputAsgGroup:- Id for autoscaling group.Outputs: outputELBTargetGroup: Description: A reference to the created Target Group Value: !Ref ELBTargetGroup outputELBSecurityGroup: Description: A reference to the created Security Group Value: !Ref ELBSecurityGroup outputElasticLoadBalancer: Description: A reference to the created Elastic Load Balancer Value: !Ref ElasticLoadBalancer outputElasticListener: Description: A reference to the created Elastic Load Balancer Listener Value: !Ref ElbListener outputAsgConfig: Description: Id for autoscaling launch configuration Value: !Ref AsgConfig outputAsgGroup: Description: Id for autoscaling group Value: !Ref AsgGroup
🔊 To view github code click here
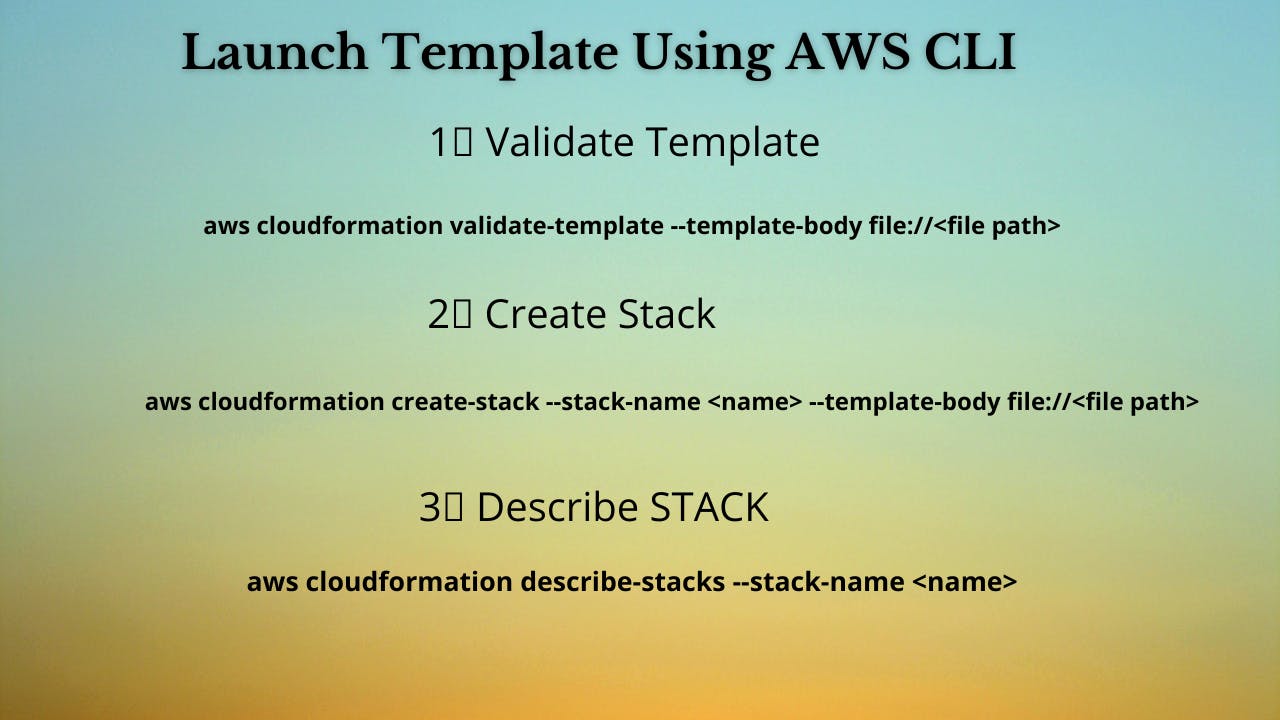
1️⃣ Lets validate our template 👨💻 aws cloudformation validate-template --template-body file://<file path> 2️⃣ After successful template verification lets create stack using our template 👨💻 aws cloudformation create-stack --stack-name asgelb --template-body file://<file path> 3️⃣ Check if the stack we created via template is completed successfully 👨💻 aws cloudformation list-stack-resources --stack-name asgelb 4️⃣ Describe stack and its resources to view its properties 👨💻 aws cloudformation describe-stacks --stack-name asgelb aws cloudformation describe-stack-resources --stack-name asgelb 5️⃣ Check events for stack formation 👨💻 aws cloudformation describe-stack-events --stack-name asgelb

❗️❗️Important AWS Documentation To Be Viewed❗️❗️
⛔️ AWS::AutoScaling::LaunchConfiguration
⛔️ Supported AWS-specific parameter types
⛔️ AWS::AutoScaling::AutoScalingGroup
⛔️ AWS::EC2::SecurityGroup
🥁🥁 Conclusion 🥁🥁
In this blog I have covered 6 resources in which we will create
✦ AWS Target Group.
✦ AWS ELB.
✦ AWS ELB Listener.
✦ Security group for ELB.
✦ Launch Configuration for EC2 instances with Userdata.
✦ Autoscaling group deployment with launch configuration created.
I have used AWS CLI command to deploy these template and trust me AWS CLI is the realtime hero and I would suggest you to get acquainted towards it. Going forward I will be releasing further parts to this CloudFormation journey
📯Stay tuned for my next blog.....
🎊**So, did you find my content helpful? If you did or like my other content, feel free to buy me a coffee. Thanks. **🎊
💫Cloudformation Series Sequence💫
🔰 Deploy VPC With Internet Gateway & Associate I
🔰 Public, Private Subnet & Route Table Creation & Association II
🔰 Private Subnet,Nat Gateway, Elastic Ip, Private Route Table & Associate III
🔰 NACL, Inbound & Outbound Routes, Security Group & Associate With Subnet IV
🔰 EC2 With Security Group & User Data & Mapping V
🔰 Target Group, Elastic Load Balancer & ELB Listener VI
🔰 Build Web Application Layer With AWS CloudFormation VII
🔰 Create Launch configuration along with Security group and AutoScaling group VIII
🔰 Deploy Autoscaling Group With Elastic Load Balancer & Target Group
⌛️Realtime Usecases Cloudformation Templates⏳
💨 Schedule Automatic Detection Of Unused AWS EBS Volumes & Notify
💨 Schedule Automatic Detection Of Non Associated AWS Elastic IP's In AWS Account On Weekly Basis And Notify
💨 Schedule Automatic Deregistration Of AWS AMI On Weekly Basis And Notify