Mastering Helm Charts: A Comprehensive Guide to Kubernetes Package Management and Advanced Techniques
Introduction
In the rapidly evolving landscape of containerized applications and microservices, Kubernetes has emerged as the de facto standard for orchestrating containerized workloads. However, managing complex Kubernetes deployments can be challenging, especially for beginners. This is where Helm, a package manager for Kubernetes, comes into play. In this comprehensive guide, we'll explore Helm Charts, the fundamental building blocks of Helm, and provide a beginner-friendly introduction to Kubernetes package management using Helm Charts.
What are Helm Charts?
Helm Charts are packages of pre-configured Kubernetes resources, such as deployments, services, and configmaps, bundled together for easy deployment. Think of Helm Charts as the "blueprints" for Kubernetes applications. They encapsulate all the necessary configuration and dependencies required to deploy and manage applications on Kubernetes clusters.
Getting Started with Helm
Before diving into Helm Charts, let's first set up Helm on your local machine or Kubernetes cluster. Helm consists of two components: the Helm client (helm) and the Helm server (Tiller). However, as of Helm v3, Tiller has been deprecated in favor of a client-only architecture, making Helm simpler and more secure to use.
To install Helm, you can follow the official installation instructions provided in the Helm documentation. Once Helm is installed, you're ready to start working with Helm Charts.
Creating Your First Helm Chart
Now that Helm is set up, let's create your first Helm Chart. Helm provides a convenient command-line interface for creating and managing Helm Charts. To create a new Helm Chart, use the helm create command followed by the name of your chart:
mkdir my-first-chart
cd my-first-chart
helm create my-first-chart
This command will generate a directory structure for your Helm Chart, including templates for Kubernetes manifests, a values file for configuration, and a Chart.yaml file for metadata.
my-first-chart/
├── charts/
├── templates/
│   ├── NOTES.txt
│   ├── _helpers.tpl
│   ├── deployment.yaml
│   ├── ingress.yaml
│   └── service.yaml
├── Chart.yaml
└── values.yaml
Understanding Helm Chart Structure
A Helm Chart consists of the following components:
Chart.yaml: Metadata file containing information about the chart, such as its name, version, description, and dependencies.
values.yaml: Configuration file containing default values for chart templates. Users can override these values during chart installation or upgrade.
templates/: Directory containing Kubernetes manifest templates written in YAML or Go template format. Helm replaces template variables with values from the
values.yamlfile during chart rendering.charts/: Directory containing dependencies for the chart, such as other Helm Charts or subcharts.
Deploying Your Helm Chart
Once you've customized your Helm Chart templates and values, you're ready to deploy your application to a Kubernetes cluster using Helm. To install a Helm Chart, use the helm install command followed by the path to your chart directory:
helm install my-release ./my-first-chart
This command will deploy your application to the Kubernetes cluster using the default configuration specified in the values.yaml file. You can override default values by passing them as command-line arguments or by providing a custom values file.
Install Nginx Using Helm Chart
Let’s install NGINX using a pre-packaged Helm Chart on your local Kubernetes cluster. Use helm search repo chart-name to look for the chart in the local repository.
$ helm search repo nginx
WARNING: Repo "bitnami" is corrupt or missing. Try 'helm repo update'.
WARNING: open C:\Users\mypc\AppData\Local\Temp\helm\repository\bitnami-index.yaml: The system cannot find the file specified.
No results found
As you can see, the local helm repository is not updated, and it fails to find the chart. You can fix this by running the command helm repo update.
$ helm repo update
Hang tight while we grab the latest from your chart repositories...
...Successfully got an update from the "bitnami" chart repository
Update Complete. ⎈Happy Helming!⎈
Then rerun the command helm search repo nginx to verify that you can now search for the NGINX Helm Chart.
$ helm search repo nginx
| NAME | CHART VERSION | APP VERSION | DESCRIPTION |
| bitnami/nginx | 9.5.13 | 1.21.4 | Chart for the nginx server |
| bitnami/nginx-ingress-controller | 9.0.6 | 1.0.5 | Chart for the nginx Ingress controller |
| bitnami/kong | 4.1.9 | 2.6.0 | Kong is a scalable, open source API layer (aka ... |
You should see all the charts have NGINX in their name.
Now, choose the bitnami/nginx chart name and install it using the helm install nginx bitnami/nginx command.
There are five different ways you can express the chart you want to install:
By chart reference:
helm install mymaria example/mariadbBy path to a packaged chart:
helm install mynginx ./nginx-1.2.3.tgzBy path to an unpacked chart directory:
helm install mynginx ./nginxBy absolute URL:
helm install mynginxhttps://example.com/charts/nginx-1.2.3.tgzBy chart reference and repo url:
helm install --repohttps://example.com/charts/mynginx nginx
Before you continue with installing the Helm Chart, make sure you have a local Kubernetes cluster up and running.
The following is the output of running helm install nginx bitnami/nginx:
$ helm install nginx bitnami/nginx
NAME: nginx
LAST DEPLOYED: Wed Nov 17 01:12:56 2021
NAMESPACE: default
STATUS: deployed
REVISION: 1
TEST SUITE: None
NOTES:
** Please be patient while the chart is being deployed **

NGINX can be accessed through the following DNS name from within your cluster:

    nginx.default.svc.cluster.local (port 80)

To access NGINX from outside the cluster, follow these steps:

1. Get the NGINX URL by running these commands:

  > NOTE: It may take a few minutes for the LoadBalancer IP to be available.
        Watch the status with: 'kubectl get svc --namespace default -w nginx'

    export SERVICE_PORT=$(kubectl get --namespace default -o jsonpath="{.spec.ports[0].port}" services nginx)
    export SERVICE_IP=$(kubectl get svc --namespace default nginx -o jsonpath='{.status.loadBalancer.ingress[0].ip}')
    echo "http://${SERVICE_IP}:${SERVICE_PORT}"
Verify the installation by running kubectl.
kubectl get all
| NAME | READY | STATUS | RESTARTS | AGE |
| pod/nginx-5c55555f86-wk4pt | 1/1 | Running | 0 | 35s |
| NAME | TYPE | CLUSTER-IP | EXTERNAL-IP | PORT(S) | AGE |
| service/kubernetes | ClusterIP | 10.96.0.1 | <none> | 443/TCP | 27d |
| service/nginx | LoadBalancer | 10.109.204.224 | <pending> | 80:30682/TCP | 35s |
| NAME | READY | UP-TO-DATE | AVAILABLE | AGE |
| deployment.apps/nginx | 1/1 | 1 | 1 | 36s |
| NAME | DESIRED | CURRENT | READY | AGE |
| replicaset.apps/nginx-5c55555f86 | 1 | 1 | 1 | 36s |
You’ll notice from the output above that Helm has created the service, Pod, deployment, and replica set for us.
Run the helm list command to list down the deployed or failed releases.
$ helm list
| NAME | NAMESPACE | REVISION | UPDATED | STATUS | CHART | APP VERSION |
| nginx | default | 1 | 2021-11-17 01:12:56.74093 +0530 IST | deployed | nginx-9.5.2 | 1.21.1 |
Since you are using minikube as a local Kubernetes cluster, you can use the minikube service nginx command to expose the service for external access.
$ minikube service nginx
| ----------- | ------- | -------------- | ---------------------------- | |||||
| NAMESPACE | NAME | TARGET PORT | URL | |||||
| ----------- | ------- | -------------- | ---------------------------- | |||||
| default | nginx | http/80 | http://192.168.64.20:30682 | |||||
| ----------- | ------- | -------------- | ---------------------------- |
Opening service default/nginx in default browser...
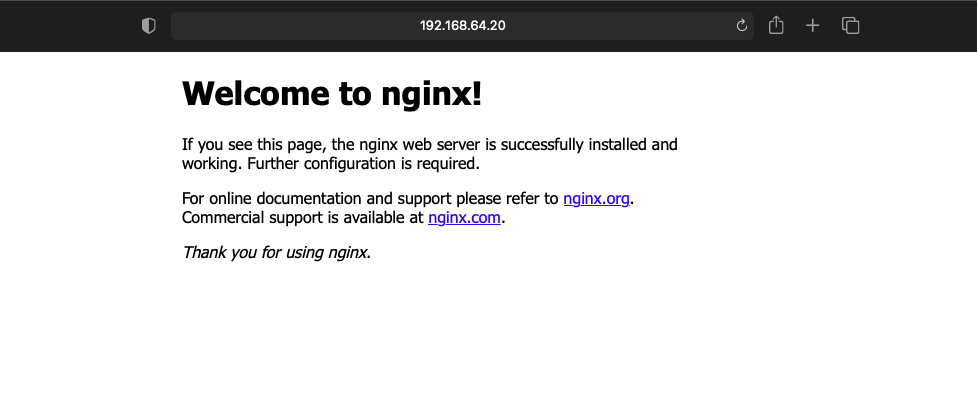
Use the URL mentioned in the preceding output to access your application:

Optimization Strategies for Helm Charts
Parameterization and Templating:
Parameterize your Helm charts to make them more flexible and reusable across different environments. Use values files to define configuration options, such as image versions, resource limits, and environment-specific settings.
Leverage Helm's powerful templating engine to dynamically generate Kubernetes manifests based on parameterized values. Utilize conditionals, loops, and functions to create dynamic and reusable templates.
Chart Inheritance and Composition:
Embrace the concept of chart inheritance and composition to modularize your Helm charts and promote reusability. Break down complex applications into smaller, composable components and create separate Helm charts for each component.
Use dependencies and subcharts to define relationships between Helm charts and manage complex application topologies. This allows for easier versioning, distribution, and management of dependencies.
Efficient Resource Management:
Optimize resource management in Helm charts to ensure efficient resource utilization and scalability. Define resource requests and limits for containers to prevent resource contention and improve cluster stability.
Leverage Helm's support for Helm hooks to implement lifecycle management tasks, such as database migrations, initialization, and cleanup, within your charts. Use pre-install, post-install, pre-upgrade, and post-upgrade hooks to execute custom logic at specific lifecycle stages.
Best Practices for Helm Charts
Versioning and Dependency Management:
Adhere to versioning best practices to maintain compatibility and stability in your Helm charts. Use semantic versioning (SemVer) to indicate compatibility and clearly communicate changes between releases.
Manage chart dependencies carefully by specifying compatible version constraints and ensuring that dependencies are properly resolved during installation. Use Helm's dependency management commands (
helm dependency update,helm dependency build) to manage chart dependencies.
Security and Compliance:
Implement security best practices to protect sensitive data and ensure compliance in Helm charts. Use Kubernetes secrets to store confidential information, such as passwords, API keys, and certificates, and reference them securely within your charts.
Regularly audit and review your Helm charts for security vulnerabilities and compliance violations. Utilize vulnerability scanning tools, such as Trivy or Clair, to identify and remediate security issues in your container images and Helm charts.
Code Example: Parameterized Helm Chart
Below is an example of a parameterized Helm chart (values.yaml and deployment.yaml) that demonstrates the use of parameterization and templating:
yamlCopy code# File: values.yaml

replicaCount: 3
image:
  repository: nginx
  tag: latest
containerPort: 80
yamlCopy code# File: templates/deployment.yaml

apiVersion: apps/v1
kind: Deployment
metadata:
  name: {{ .Chart.Name }}-deployment
  labels:
    app: {{ .Chart.Name }}
spec:
  replicas: {{ .Values.replicaCount }}
  selector:
    matchLabels:
      app: {{ .Chart.Name }}
  template:
    metadata:
      labels:
        app: {{ .Chart.Name }}
    spec:
      containers:
      - name: {{ .Chart.Name }}-container
        image: "{{ .Values.image.repository }}:{{ .Values.image.tag }}"
        ports:
        - containerPort: {{ .Values.containerPort }}
Conclusion
By applying advanced techniques and optimization strategies, you can harness the full potential of Helm charts to streamline the management of Kubernetes applications. From parameterization and templating to efficient resource management and security best practices, mastering Helm charts empowers you to build scalable, reliable, and secure Kubernetes deployments. Incorporate these best practices and techniques into your Helm chart development workflow to optimize efficiency and reliability in your Kubernetes environments. Happy charting!
If you found this guide valuable, don't forget to like and share it with your peers. Stay tuned for more insightful content by following me for future updates. Together, let's continue to unlock the full potential of Argo CD and empower the Kubernetes community with advanced deployment strategies and best practices. Thank you for reading!

