

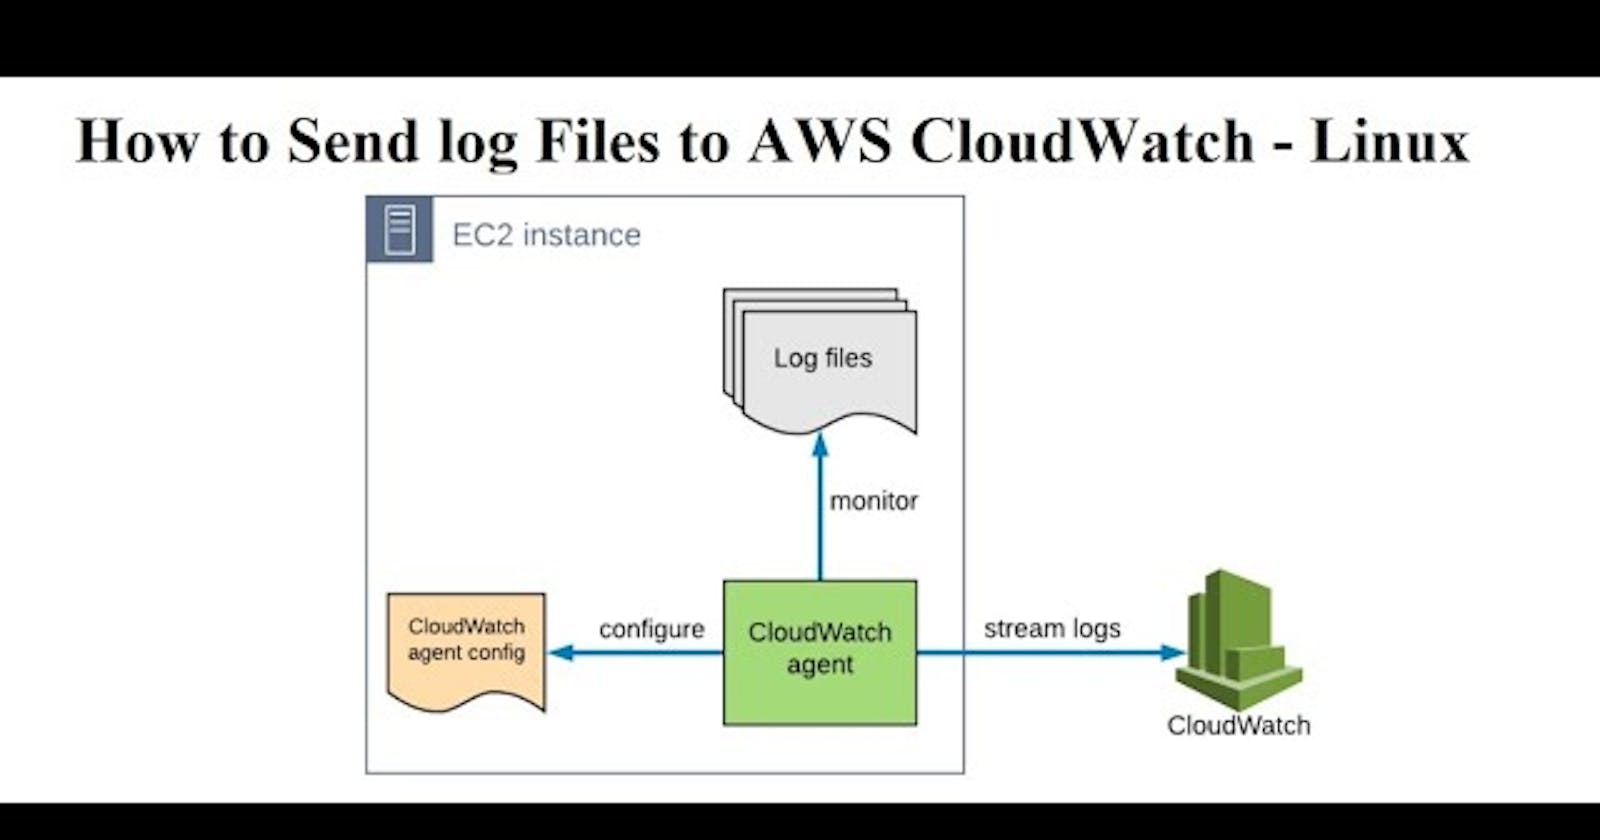


If you need one place to store and manage your AWS logs, look no further than Amazon CloudWatch. CloudWatch is a handy feature that helps with event correlation and is critical in maintaining visibility within your technical infrastructure.
Since Elastic Compute Cloud (EC2) Instances commonly run critical workloads, log visibility is vital, and it makes complete sense to integrate EC2 with CloudWatch.
In this blog, you’re going to learn how to set up one component of CloudWatch on your AWS EC2 instances, the CloudWatch Agent. Once configured, the agent will then send selected logs to AWS CloudWatch for further investigation.
Table of Contents
- Prerequisites
- Creating an IAM Role
- Attaching an IAM Role
- Downlaoding and Installing the CloudWatch Agent, configuring & Activating the CloudWatch Agent
Prerequisites
- An AWS Account
- An IAM User with:
- AWS Management Console access
- The IAM permissions required to perform IAM, EC2, and CloudWatch activities.
IAM policy creation and AWS Application Programming Interface (API) permissions are outside this article’s scope. Always adhere to the principle of least privilege when authorizing accounts to perform actions.
- Administrative access to an EC2 Instance.
Creating an IAM Role
Before CloudWatch will work with an EC2 instance, it must have an IAM role. An IAM role, if properly configured for least privilege, allows CloudWatch to work correctly but without unnecessary permissions.
To create an IAM role that will allow your EC2 Instance to communicate with CloudWatch:
Open a web browser.
Navigate to the AWS Management Console and sign in to your AWS account by supplying your AWS (root) or IAM account credentials.
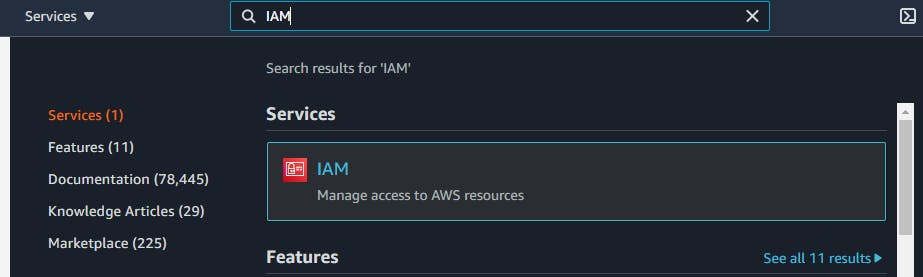
Click Services on the upper left-hand corner of your screen.

Next, click IAM from the Services drop-down menu located under the Security, Identity, & Compliance category. This option will take you to the IAM console.
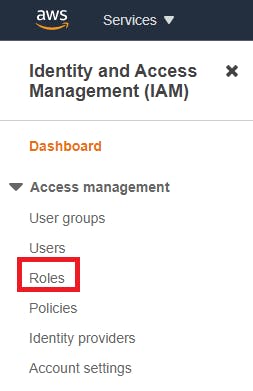
Now, click Roles from the menu on the screen’s left-hand side located under the Access Management category.
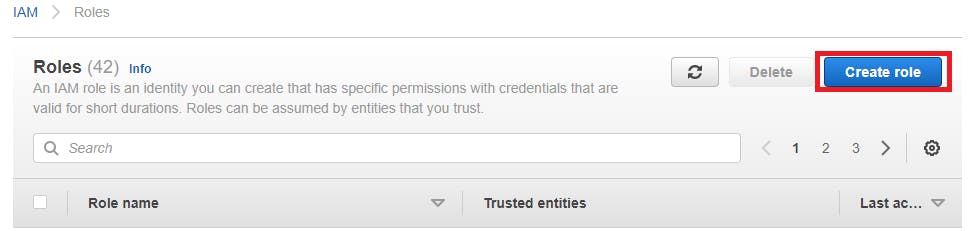
From the Roles screen, select Create Role, located at the top of your screen. You may see a message at the top of your screen that describes what an IAM role is. If that is the case, the Create Role option is located underneath the message.
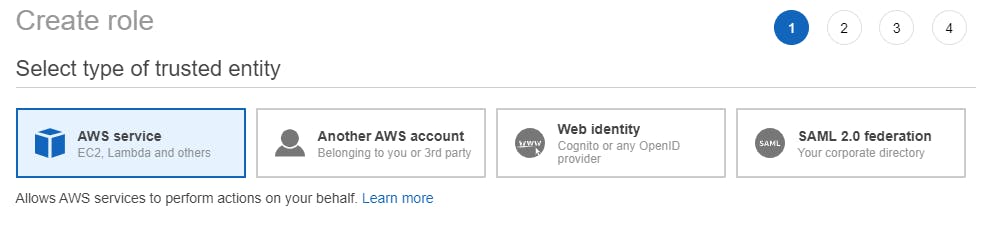
On the Create Role page, designate the Type of Trusted Entity as AWS Service. AWS Service roles allow AWS services to interact with other resources (e.g. CloudWatch) on your behalf.
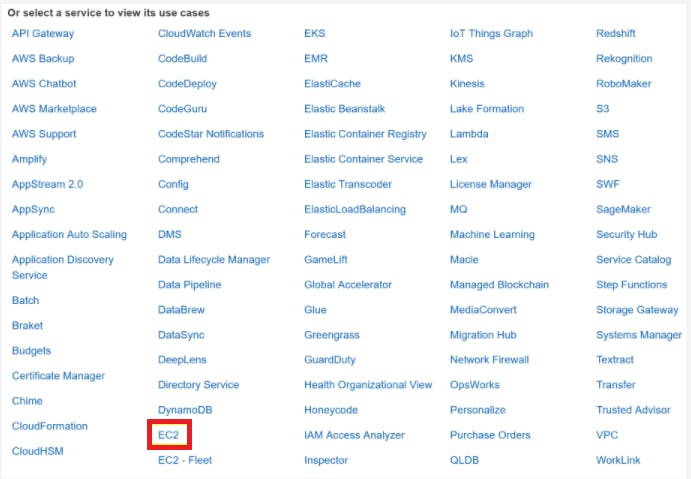
Select the EC2 option from the list of use cases since the CloudWatch Agent will be installed on an EC2 Instance and will communicate with CloudWatch.
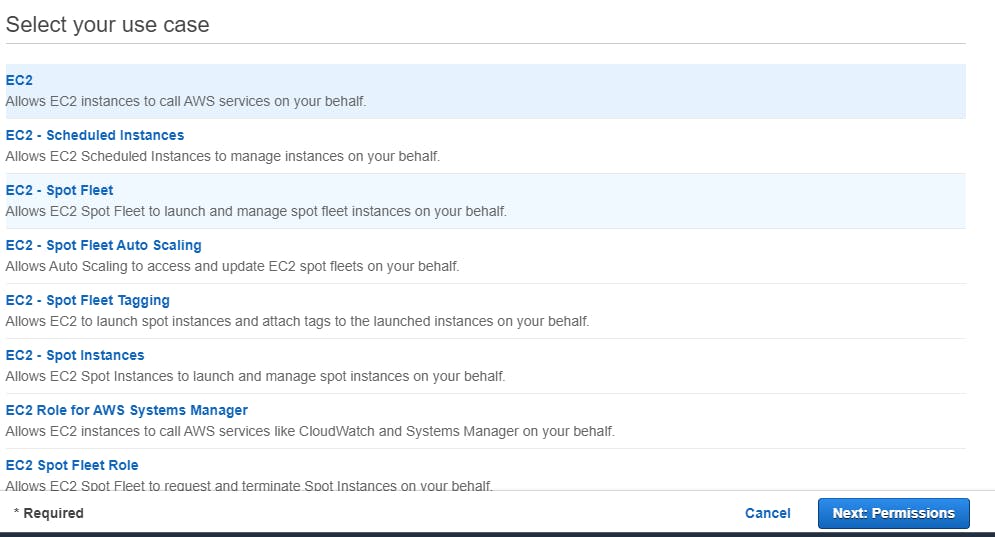
From the list of use cases, select the EC2 option and then select Next: Permissions.
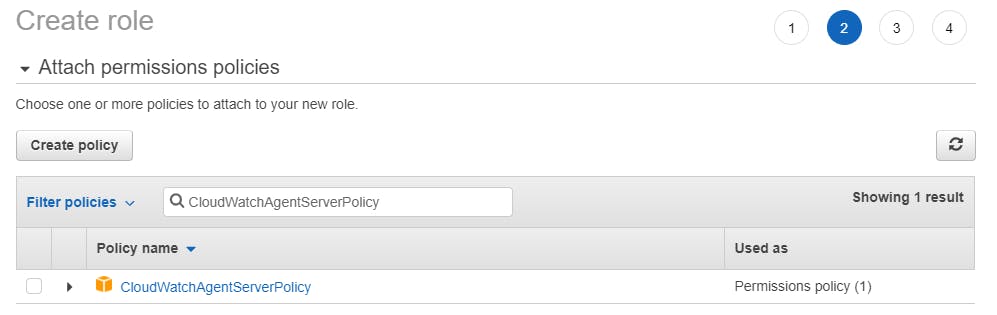
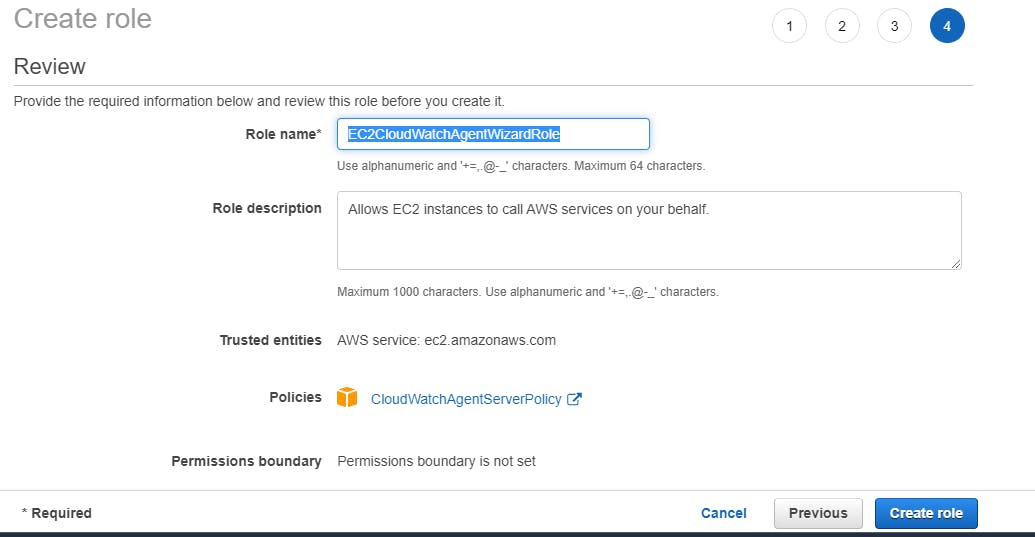
On the permissions page, enter “CloudWatchAgentServerPolicy” into the search bar and then check the box to the left of the CloudWatchAgentServerPolicy’s Policy Name. After checking the box, select Next: Tags. The CloudWatchAgentServerPolicy contains a set of list, read, and write permissions that allow your EC2 Instance to collect and send metrics and logs to CloudWatch. The policy’s JavaScript Object Notation (JSON) is shown below. For more information on JSON policy elements, reference AWS documentation.
Assign your role a unique name and select Create Role. In the following screenshot, this tutorial’s Role name is EC2CloudWatchAgentWizardRole
Attaching an IAM Role while creating new EC2 instance.
Assuming you’re still in the AWS Management Console, click Services in the upper left-hand corner of your screen.
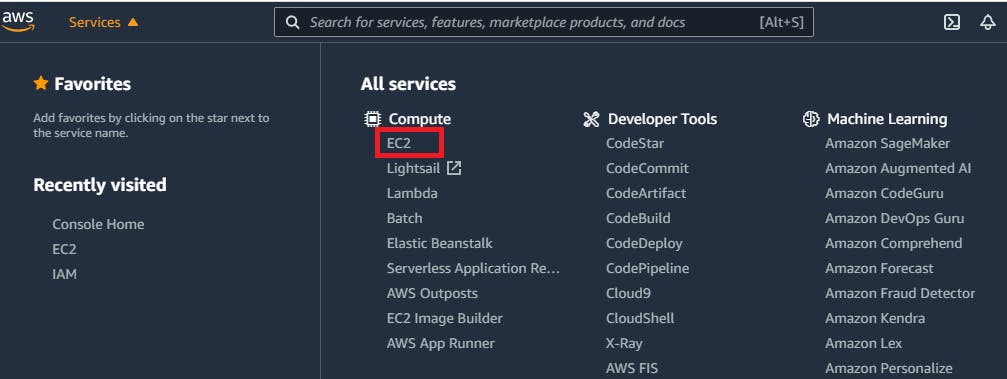
Now click EC2 under All services. This option will take you to the EC2 console. Select Instances from the menu on the left-hand side of the screen under the Instances category.
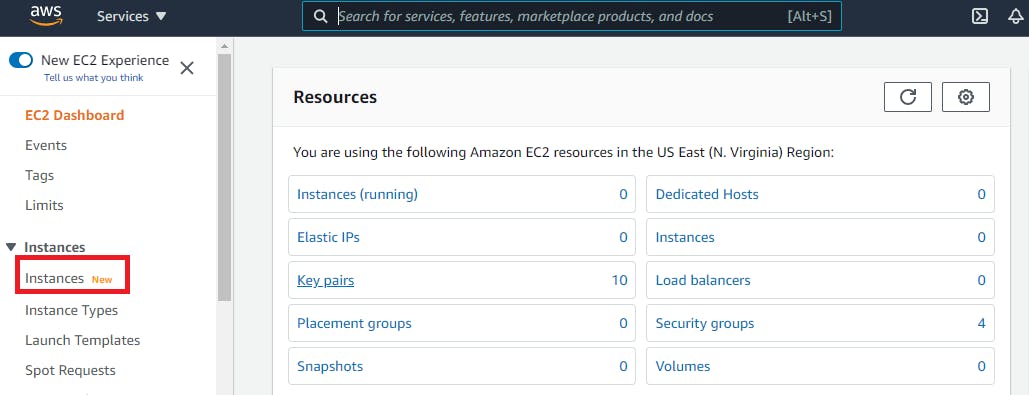
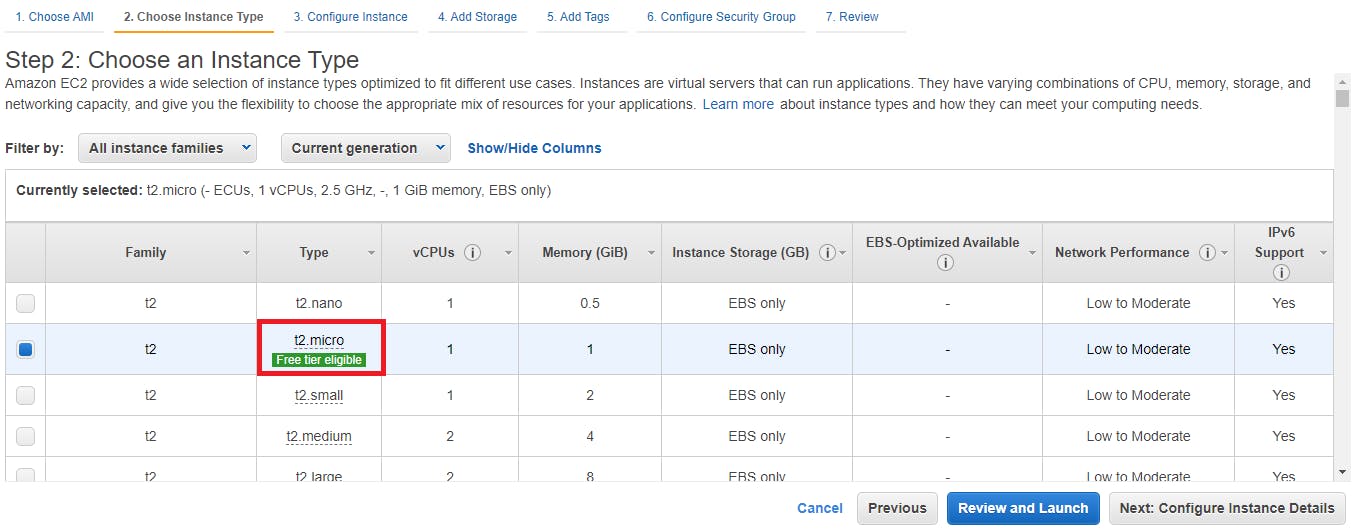
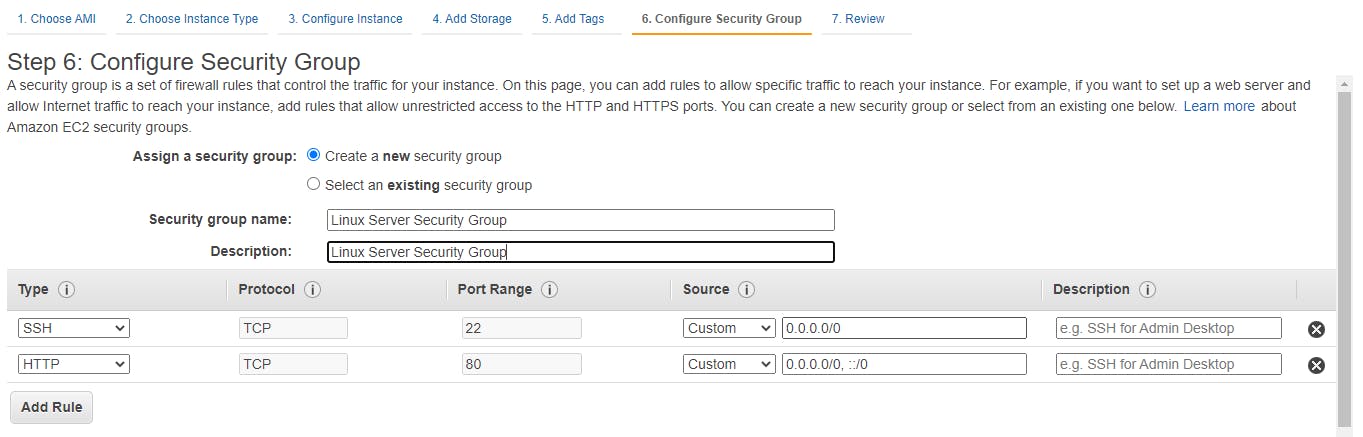
Within the Instances window, click on launch instance and follow along
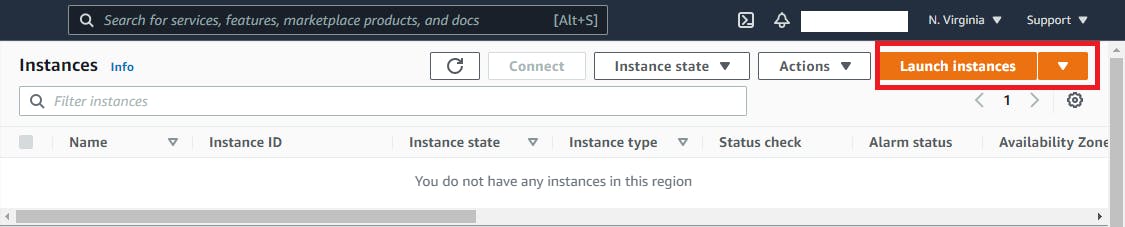

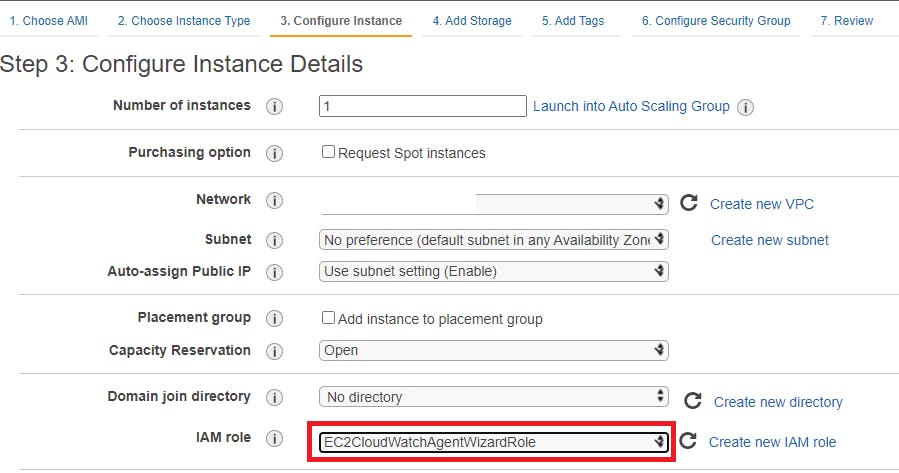
In Step 3 in IAM role field make sure to select our role "EC2CloudWatchAgentWizardRole" and follow along for next steps
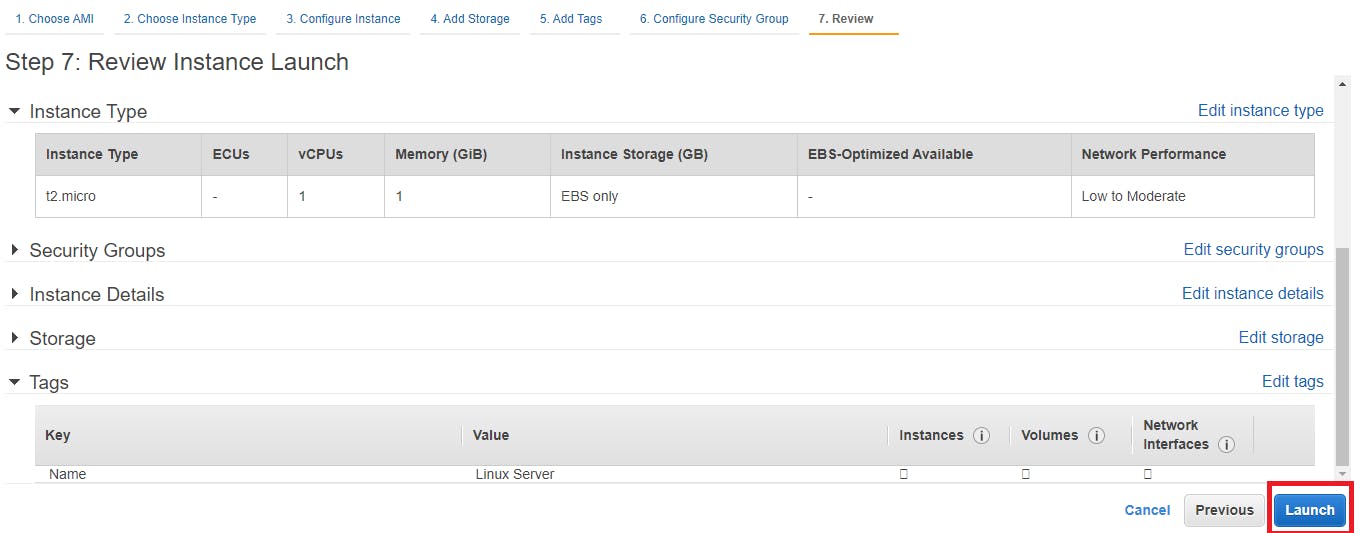
On Review instance screen click on launch.
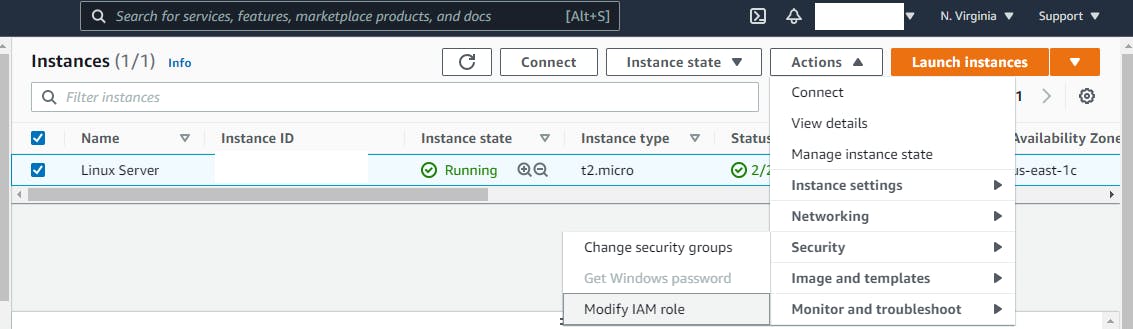
Attaching an IAM Role For existing EC2 instance
Assuming you’re still in the AWS Management Console, click Services in the upper left-hand corner of your screen.

Now click EC2 under All services. This option will take you to the EC2 console. Select Instances from the menu on the left-hand side of the screen under the Instances category.
Select Actions —> Security —> Modify IAM Role.
The Modify IAM Role option brings you to a menu that allows you to select and attach the IAM role created earlier. Now, select the role you created earlier "EC2CloudWatchAgentWizardRole" from the drop-down menu and then click Save.
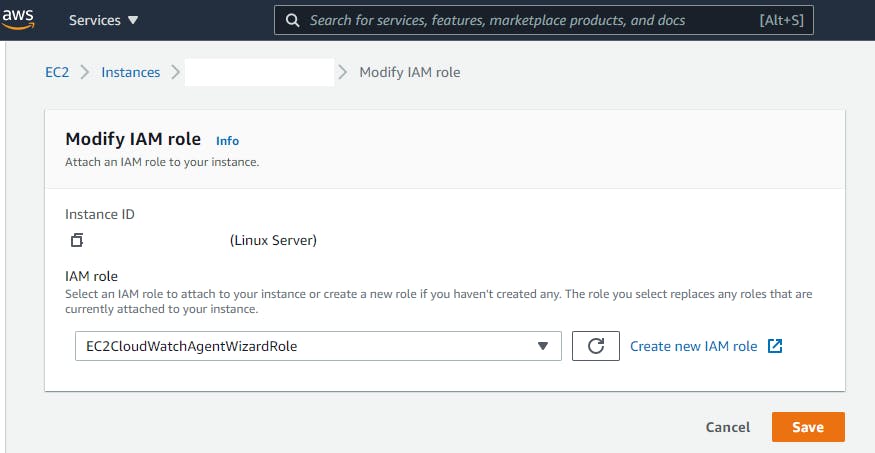
Verify the role is attached to your EC2 Instance by viewing the success message on the top of your screen. The success message contains the IAM role name and the EC2 instance’s Instance ID.
Installing the CloudWatch Agent and configuring & Activating the CloudWatch Agent.
Note:- rpm repository path sometimes changes so for cloudwatch installation latest commands click here
- ssh to Linux server using putty/gitbash. After login run below command to download the rpm package. After running below command you will see below output
wget https://s3.amazonaws.com/amazoncloudwatch-agent/amazon_linux/amd64/latest/amazon-cloudwatch-agent.rpm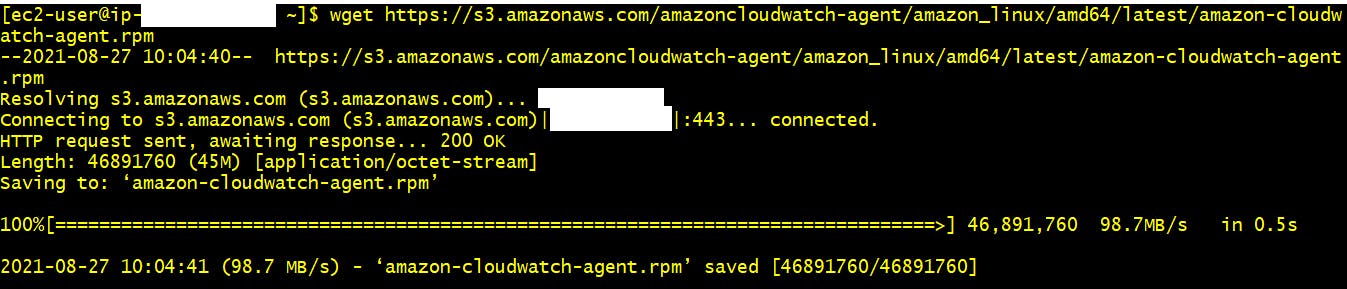
- Install cloudwatch agent now using below command. After running below command you will see below output
sudo rpm -U ./amazon-cloudwatch-agent.rpm
After successfull installation run below command and it will list down all files present in bin directory. Here you can see "amazon-cloudwatch-agent-config-wizard" executable file.
ls /opt/aws/amazon-cloudwatch-agent/bin/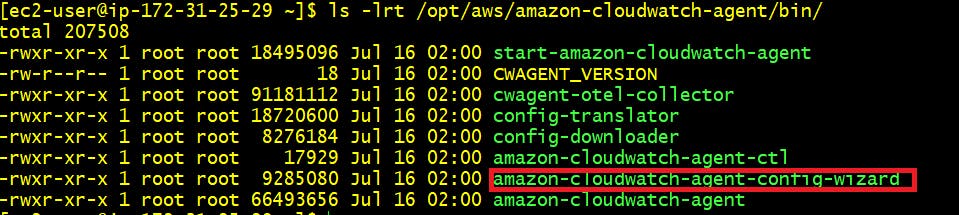
Run this executable file using below command and the cloudwatch wizard console will launch
sudo /opt/aws/amazon-cloudwatch-agent/bin/amazon-cloudwatch-agent-config-wizard
Step 1:- On which OS are you planning to use the agent? > 1. Linux

Step 2 Are you using EC2 or On-Premises hosts? 1. EC2

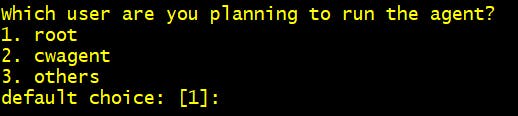
Step 3 Which user are you planning to run the agent? 1. root [you can change as per your preference]
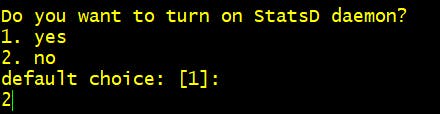
Step 4 Do you want to turn on StatsD daemon? 2. No
Step 5 Do you want to monitor metrics from CollectD? 2. No

Step 6 Do you want to monitor any host metrics? 1. Yes

Step 7 Do you want to monitor cpu metrics per core? 2. No

Step 8 Do you want to add ec2 dimensions? 1. Yes

Step 9 Would you like to collect your metrics at high resolution? 4. 60s

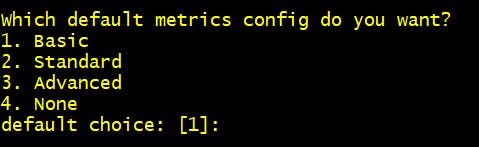
Step 10 Which default metrics config do you want? 1. Basic
Step 11 Are you satisfied with the above config? 1. Yes

Step 12 Do you have any existing CloudWatch Log Agent? 2. No

Step 13 Do you want to monitor any log files? 2. Yes
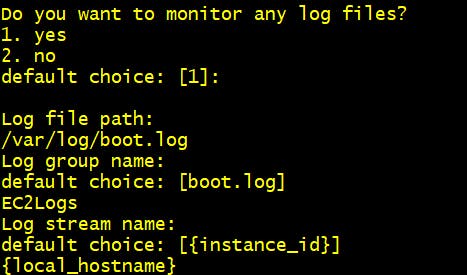
Step 14 Do you want to specify any additional log to monitor? 2. No

Step 15 Do you want to store the config in the SSM parameter store? 2. No

Output of the cloudwatch agent json file will be stored at "/opt/aws/amazon-cloudwatch-agent/bin/config.json" . Code snippet of json file with above selected parameters in cloudwatchagent wizard is as follows.
        "agent": {
                "metrics_collection_interval": 60,
                "run_as_user": "root"
        },
        "logs": {
                "logs_collected": {
                        "files": {
                                "collect_list": [
                                        {
                                                "file_path": "/var/log/boot.log",
                                                "log_group_name": "EC2Logs",
                                                "log_stream_name": "{local_hostname}"
                                        }
                                ]
                        }
                }
        },
        "metrics": {
                "append_dimensions": {
                        "AutoScalingGroupName": "${aws:AutoScalingGroupName}",
                        "ImageId": "${aws:ImageId}",
                        "InstanceId": "${aws:InstanceId}",
                        "InstanceType": "${aws:InstanceType}"
                },
                "metrics_collected": {
                        "disk": {
                                "measurement": [
                                        "used_percent"
                                ],
                                "metrics_collection_interval": 60,
                                "resources": [
                                        "*"
                                ]
                        },
                        "mem": {
                                "measurement": [
                                        "mem_used_percent"
                                ],
                                "metrics_collection_interval": 60
                        }
                }
        }
It will now start streaming EC2 "boot.log" from path "/var/log/boot.log" to cloudwatch along with EC2 metrices that we have enabled. We can add multiple log files which needs to be streamed into this json file.
You can find practical implementation of above steps in below video.
Conclusion
We have seen how to stream CloudWatch logs from EC2 to cloudwatch by using cloudwatch agent configuration wizard . This wizard automates our task to create json file based on our requirement with user friendly option.
And stay tuned, for my next blogs..
